The connection of the shoulder sections of the jackets carry out the same as in the coat (see chap 1, p 12).
Treatment of the lower collar

Parts of the collar, cutting rules and allowable extensions are specified in CH 1, p 3, 4.
For more severe forms of collar is required when sewing jackets, spacer with bottom collar to connect the sanding machine from the front side of the lower collar in two ways. In the first method the lower collar wasteheat zigzag lines (Fig. 76, a). The first line laid parallel to the front at a distance of 1.2 cm from the edge. Then wasteheat, starting from the middle bottom of the collar to the ends, first one, then the other side without going on the rack over the laid line. The location of the lines on the cut of the departure depends on the processing methods.When processing obecnym collar seam line do not lead to cutoff of 0.7 - 1 cm (including trimming and seam allowance); in the treatment of collar seam to hem, lines do not reach the magnitude of the clipping on the left. The distance between the corners of the lines 1.5 - 2 cm
Collar with a more rigid stand wasteheat along the length of the strut (Fig. 76, b). Before wystepowaniem from the front side of the lower collar outline of the crest line of the rack. Products in the clasp to the lapel of the line is a continuation of the line of inflection lapel. First wasteheat rack, and then flying away. The first line laid parallel to the cut stands at a distance of 1.2 cm from the cut edge, the second crest line stand and the following is a continuous line parallel to each other with distance between them of 0.2 - 0.5 cm.Departure wasteheat in two steps: one and the other side of the mid - zig-zag lines with the distance between the angles of 1.5 cm When the wet-heat treatment of the collar from the strip sections of the rack and departure delay. The magnitude of the pulling test, bending the front of the line of inflection to the side of the flying face of the lower collar inside. In this stand should be tightly placed over the area of the flight. Then cut out the gasket on the shear stands 1 cm along the entire length.
The connection of the lower collar with the neck
Connecting the bottom of the collar with the neck perform bridging or patch seam. The connection bridging the seam indicated in chap 1, p 12. Patch seam bottom collar with neck link hand blind stitch stitching, sanding machine or emergency vehicles zigzag stitching.
In the products of the delicate tissues of the lower collar connected to the neck by bending the cut stands inside 0.8 - 1 cm In products of thick tissue slice fixed stand without bending on emergency vehicles zigzag stitching. Before connecting the collar to clarify the neckline and cause the subsidiary of the chalk line at the front side of the product parallel to the cut of the neck at a distance from it equal to the width of the seam connection (0,8 - 1 cm). To connect the lower collar with the neck in the products of thin tissue slice pre-treated stand.To do this, slice the rack bends in the direction of strip 0.8 - 1 cm and zastrugivajut on the sanding machine at a distance of 0.2 cm from the fold or zametyvayut in the middle of the seam allowance manual straight stitch length of 1.5 - 2 cm, or off highway. The bottom edge of the stand collar priorivet from the strip iron or press.
Collar make machined edge of the strut to namelennogo neckline faceup, equating the line of the middle of the collar and the neck of the back. In the educational process of the lower collar before nastraivanie namachivajut cut throat straight a running stitch length 1 - 1.5 cm at a distance of 0.3 - 0.4 cm from the edge of the rack in one or two doses. When namatanai retain all of the requirements for the connection of the lower collar with the neck. The lower collar scribbled at a distance of 0.2 cm from the edge, grabbing the side strip on the collar and strip on the back.The need to attach seam vrachevanie the bottom of the collar to seal the collar disappears.
When attaching the edge of the a pillar blind stitch hand stitching it is performed from the right end of the collar to the left with a frequency of 4 - 5 stitches per 1 cm on the wrong side in this case, the side sections of the strip, neck and stand collar is sutured to the gasket of the lower collar blind stitch stitching with a frequency of 2 stitches in 1 cm.
When nastraivanie the bottom of the collar onto the neckline, zigzag stitching cut stands are not pre-treated. Nastraivanie perform silk threads, overlapping the cut stands zigzag stitching. At the same time preserve all of the requirements for the connection of the lower collar with the neck.
Connecting the upper collar with the lower seam of itagiba
Before connecting the upper collar with the lower you need to perform the wet-heat treatment of the upper collar of the same techniques as the bottom. The magnitude of the pulling cut of the rack and departure depends on the width of the collar. A wider collar requires a larger pulling. Then using the utility of patterns to cut the lower collar, and an individual clothing to achieve its final shape on the mannequin. For this purpose the product is put on a mannequin, chop off the shelves in line polutanata and set the direction of the lines Raskatov on podborta. Then specify the shape and dimensions of the lower collar.The ends of the lower collar should fit the shape of the lapel. The width of the bottom of the collar outline in the middle, above the middle seam of the back, over the shoulder seams and the ends. All the planned points connect smooth lines. The right part of the collar cut on a mannequin exactly on the planned line.
The product is removed from the mannequin and put the lining inside, while call edges of cushions, benches and lapels and seam vrachevanie the bottom of the collar. Then (by beating chalk) transfer line rascepa podborta from the right to the left. On the right side of the lower collar outline left part of the line of departure and the end of the collar and trim the excess fabric on the chalk line. The chalk line Raskatov podmechayut and put a vertical control marks at the beginning and at the end of these lines.
Before connecting specify the upper collar on the bottom and set it line Raskatov. For this purpose the product is decomposed by lining up the cut leaving the bottom collar to the workers. The top collar is folded in half to find the middle and put it on the bottom face up so that the middle of the top of the collar coincides with the middle of the bottom. The upper collar should go over the bottom on the left, the ends and the front 1.5 - 2 cm, and over the line Raskatov - not less than 1 cm Chalk line Raskatov with podborov copy on the underside of the upper collar.Then the upper collar and laid it out wrong side up and Raskatov excess fabric at the collar and on podborta cut, leaving a seam allowance of 1 cm for primaqiune collar to podborta.
The top collar is folded with the ends of podborov, right sides inside, cuts call and metiaut, combining the chalk line Raskatov, and then grind off before reaching the ends of the ledges of 1.5 - 2 cm Left ends connect manual bridging line so that the line was a continuation of the machine. When grinding Raskatov can be pritchina stand collar to the lining, and in the middle of the neck backless stachivaya the ends of the hanger. With mass production garment raskay grind without prior smachivaniya.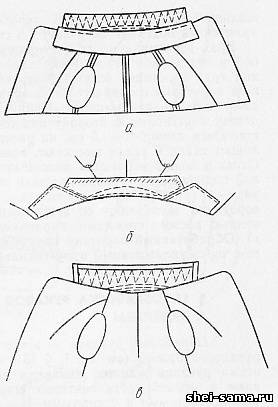
Seams Raskatov rautureau or laid out in different directions, and reinforce the straight stitches with a length of 0,8 - 1 cm on the front side of podborta at a distance from the seam rascepa equal to 0.2 - 0.3 cm. Then the upper collar swerve to the side lining products and Raskatov seams sewn to the strip of the lower collar hand straight stitches with a length of 0.7 - 0.8 cm at a distance of 0.1 cm from the seam stitching Raskatov (Fig. 77, a). If the upper strut collar stachan lining, then sew this seam by hand to strip the bottom of the collar, at the same time securing the ends of the hanger.Seam joints strut top collar with padding can be attached to sanding the seam vrachevanie the bottom of the collar.
Turn the top collar to the bottom strip and namachivajut his three lines (Fig. 77, b): first run parallel to the seams Raskatov at distance 0.2 - 0.3 cm and parallel to the cut stand collar, margins of 1 cm, stitch length of 0.8 - 1 cm; the second by the line of bend of the strut from the bottom of the collar from the left lapel to the right stitch length 2.0 - 2.5 cm; the third at the ends and leave the collar at a distance from the slices of 0.5 - 0.6 cm When the upper collar namatanai pokazyvaut on departure and ends. The fit in the corners of the collar storevault through moist protohellenic.The excess of the upper collar cut, leaving a seam allowance on ACC - on-off 1.2 cm, 1.5 cm
The edges of the collar can be fixed with the help uspeshnoi and finishing stitches or adhesive film. When attaching edge of the collar uspeshnoi line cuts the upper and lower connecting collar blind stitch stitching stitches slant or off highway. Allowance of the upper collar on the departure of the bend towards the bottom and zametyvayut straight stitches with a length of 1 - 1,5 cm, at a distance of 0.8 cm from the edge. Excess fabric in the corners cut out, the ends of the collar zametyvayut. Departure and the ends of the collar stitched on emergency vehicles blind stitch or hand-stitching slanted stitches, and in bulk tissue cross - shaped stitches.The ledges of the lapels and the ends of the collar fastened with the bottom of the collar is five or six slanted stitches, aligning the seams Raskatov (Fig. 77,). Processed collar priorivet press or iron through a moist protohellenic.
|
