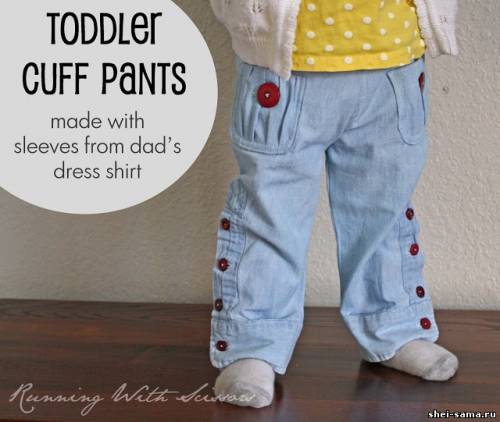
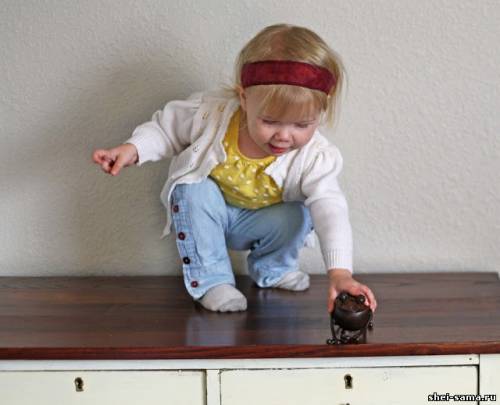
I decided to use a shirt to sew pants for our daughter.
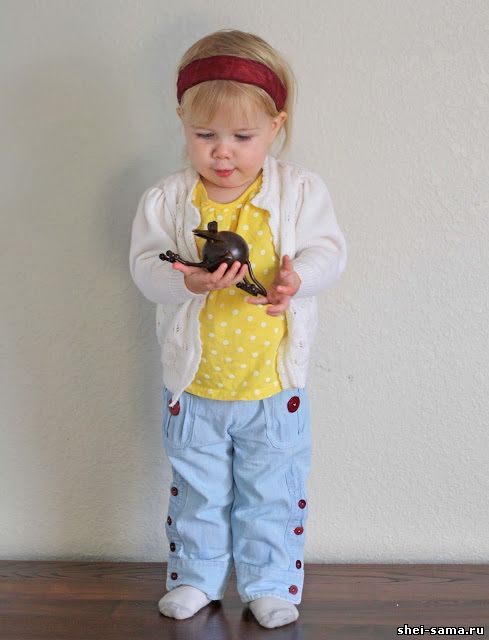
The restructuring of the shirts my husband's pants. I used the sleeves for leg. It is obvious that the sleeves will fit size only for pants toddlers.
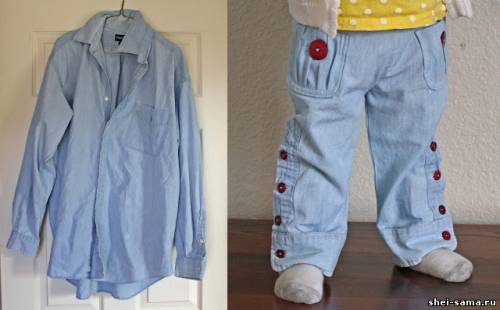
I used a basic pants with elastic waistband and added patch pockets. Sew the sleeves from the underarm seams and go to a point at the waist. You can also add back pockets.
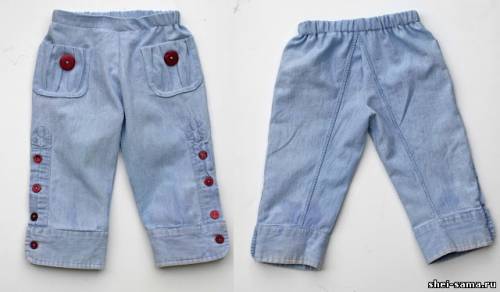
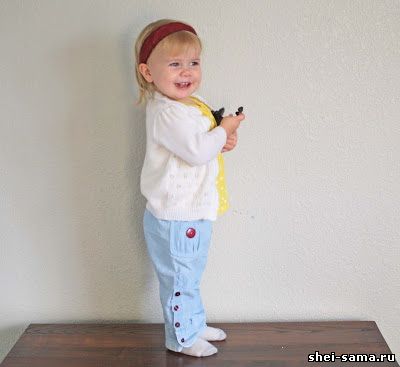
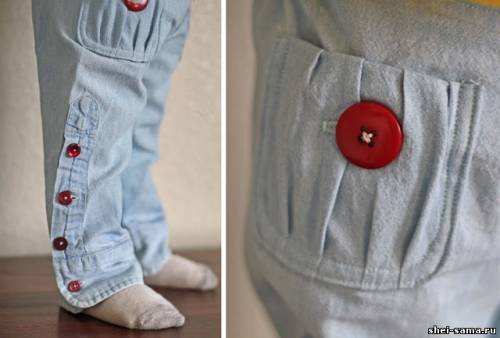
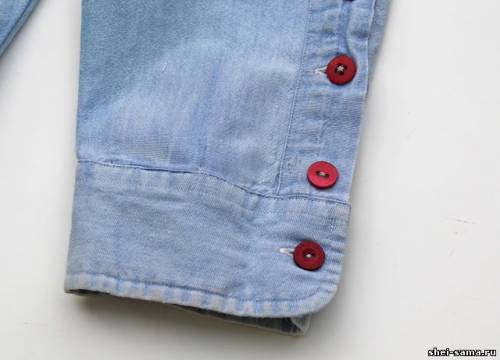
A unique item that comes out of the leg, of course, interesting cuffs and buttons at the side seams. I added pleated patch pockets with contrast buttons.
Start with cutting the sleeves at the shoulders.
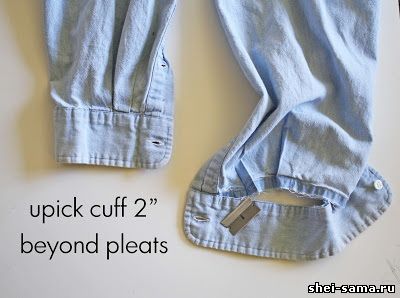
To avoid the funny folds in his pants above the cuff, You need to get rid of creases in the wrist men's shirts. Need to unpick the cuffs from the sleeves (not completely).
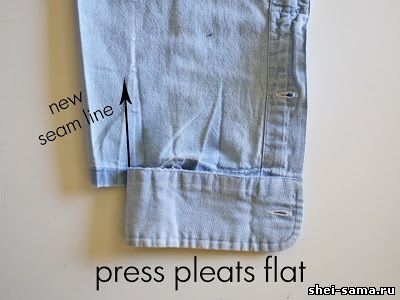
Flatten the sleeve to remove the creases.
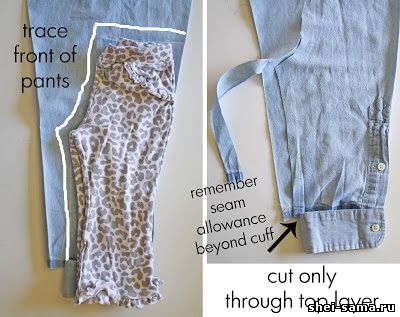
Use a pair of pants that fit.
**Don't forget to plan the seam allowance at the bottom of the sleeve, so that after stitching to match the width of the cuff**
Cut along your line.
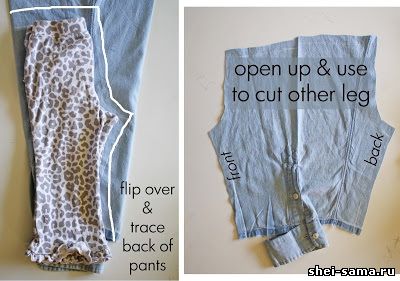
Turn the sleeve on the other side, and fold the trousers to the rear half of the match. Repeat the same steps with the other sleeve.
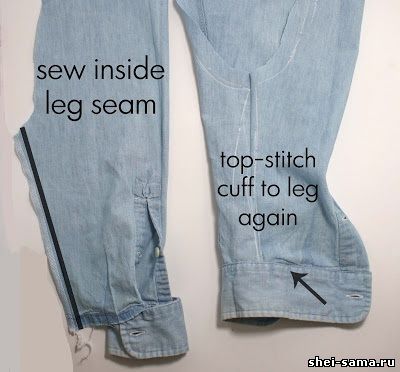
Sew inseam of legs, making sure that the pant leg will match across the width of the cuff by sewing.
To sew the cuffs of the sleeves. Repeat on the other sleeve.
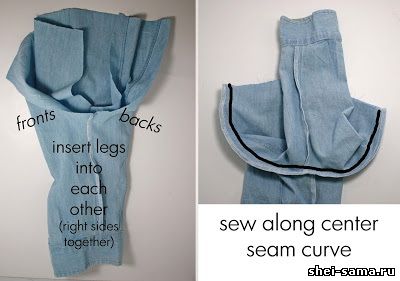
To connect the two legs by inserting one into the other. Sew along the curve, creating a Central front and rear seam.
PLEATED POCKETS
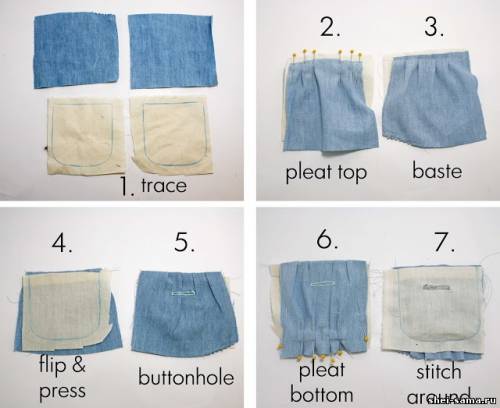
1. Translate pocket of the desired shape on gauze or lining fabric, cut rectangles using scraps from the top of the sleeve about 3 cm larger than the desired pocket.
2. The outer edges of the pocket to combine the sides on the gauze, then the rest of the excess fabric to fold into pleats.
3. Sew through the pleats along the line of the upper side of the pocket.
4. Put cheesecloth inside, turning down the raw edge between the layers.
5. Measure the button and stitch a horizontal loop, through both layers.
6. To do it again folds at the bottom of the pocket as you did on the top.
7. To stitch around the pocket, in the form of "U", connecting vesu pleated fabric with lining. Trim the edges with an allowance of 0.6 cm
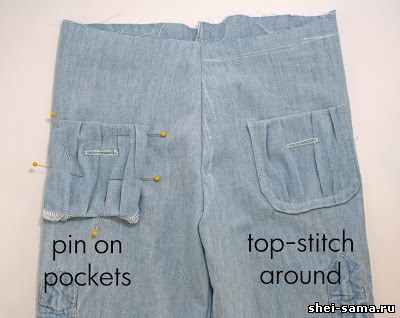
8. Patch front pockets of his pants.
I used the "side seam" as a guide for the outer edge of the pocket and put it their pockets vertically between the top strap, sleeves and waist.
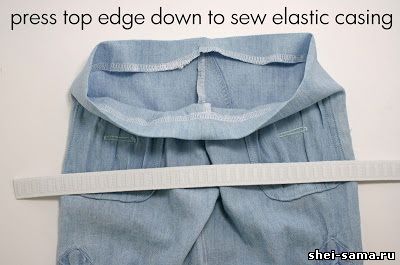
To create a cavity under the elastic band, decorate the top edge by serging. Fold the top edge 2.5 cm on the wrong side of the pants. Sew around the waist seam, which makes the cavity, but leave 5 - 7 cm unsewn so that you will have a hole in the pipe.
Cut 2 cm wide elastic band in the desired length of the waist, and with the help of safety pins thread through the waistband.
Pulling both ends of the elastic bands from the hole that you left, sew them together, then finish sewing hole to finish with an elastic band.
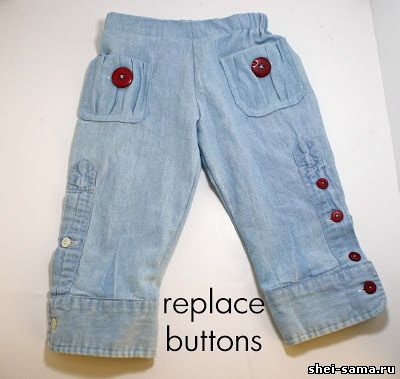
Add buttons to the pockets and replace the original buttons of the shirt with something funny. I decided to add four buttons at the placket sleevesto look more Mature and less like a sleeve on a child's leg. Finished! The folds disappeared, leaving straight leg pants with unique buttoned side seam and thick cuffs!
I think this same idea is perfect for little boys, making them with large pockets, patches on the knees, and snaps instead of buttons for a more masculine look.
Thank you for what you have visited my website. In other sections you can find even more clothes for the kids, and more sewing for adults!
| 
